
WHY LEARN ISOMETRIC
This is a brilliant method to produce designs really quickly, enabling students to focus on the idea and not the presentation. Excellent for the initial ideas section as it enables pace and flow of thinking. It’s like visual note taking.
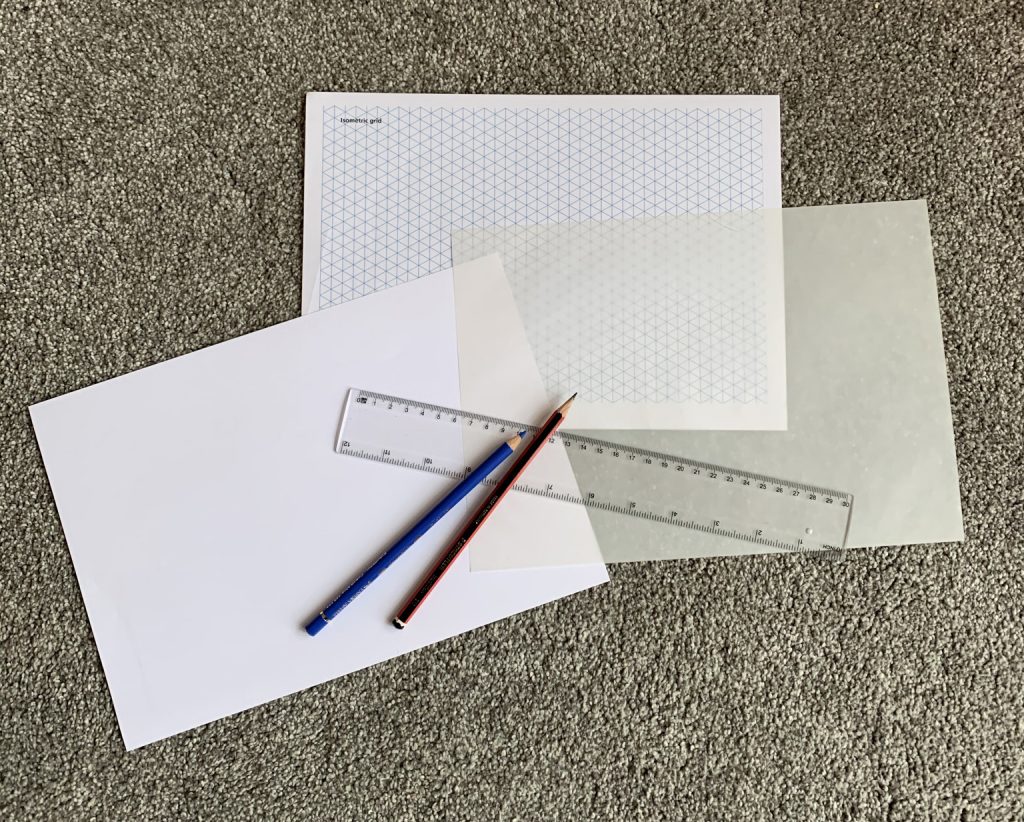
EQUIPMENT NEEDED
- Isometric Grid Paper
- Tracing Paper
- 2H Pencil
- Blue Pencil
- 0.1 approx. Fine liner
- 0.6 approx. Fine liner
- Rule, eraser, pencil sharpener
- Adobe Scan App for the mobile phone – Enables you to store and clean up drawings
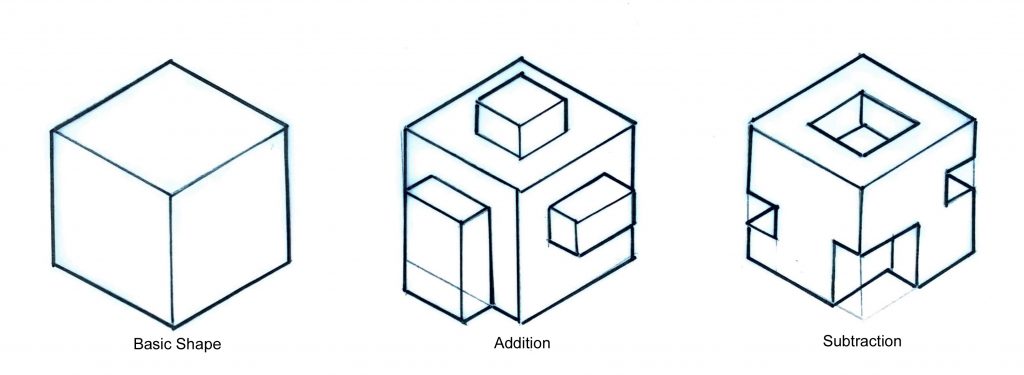
BASICS
- Crates
- Addition
- Subtraction
- Curves
TO BE TAUGHT
Learning the basic skills & techniques needed to use this drawing method and how it can be extended
APPLICATION
- Buildings
- Urban Design
- Street Furniture
- Seating
TO BE GUIDED
Applying the method to produce effective outcomes to ensure understanding of use
PROJECTS
- Street Furniture
- Outdoor Seating
- Harchester
- NEA
TO BE CREATED
Projects where these skills will enable the designs to be produced quickly and effectively
______________________________________________________________________
BASICS
- TASK 1
- Using isometric paper and tracing paper draw a range of boxes, known as crates, to produce a range of 3D images
- TEACHER DEMO NECESSARY
- Show how to undertake this construction methods
- REASON WHY
- Producing boxes/crates gives you a frame which can be adapted to produce complex design
______________________________________________________________________
- TASK 2
- Now draw a new crate and add further crates onto this one, try different sizes and positions
- TEACHER DEMO NECESSARY
- Show how this can be done, put something on all sides
- REASON WHY
- This is to start to help develop complex shapes
______________________________________________________________________
- TASK 3
- Either on the same crate or a new crate, try to draw a hole in it. if this goes well try to draw some more.
- TEACHER DEMO NECESSARY
- Break this task done and show a variety
- REASON WHY
- This is an essential stage in developing complex shapes
______________________________________________________________________
______________________________________________________________________
- TASK 4
- Draw out some crates and draw a variety of curves and arches
- TEACHER DEMO NECESSARY
- Show how to construct a circle, and that it’s called an ellipse, then move onto using this curving technique for arches and general curves in a variety of crates
- REASON WHY
- To enable curves to be used in designing and help create more complex and interesting shapes which can also soften a design
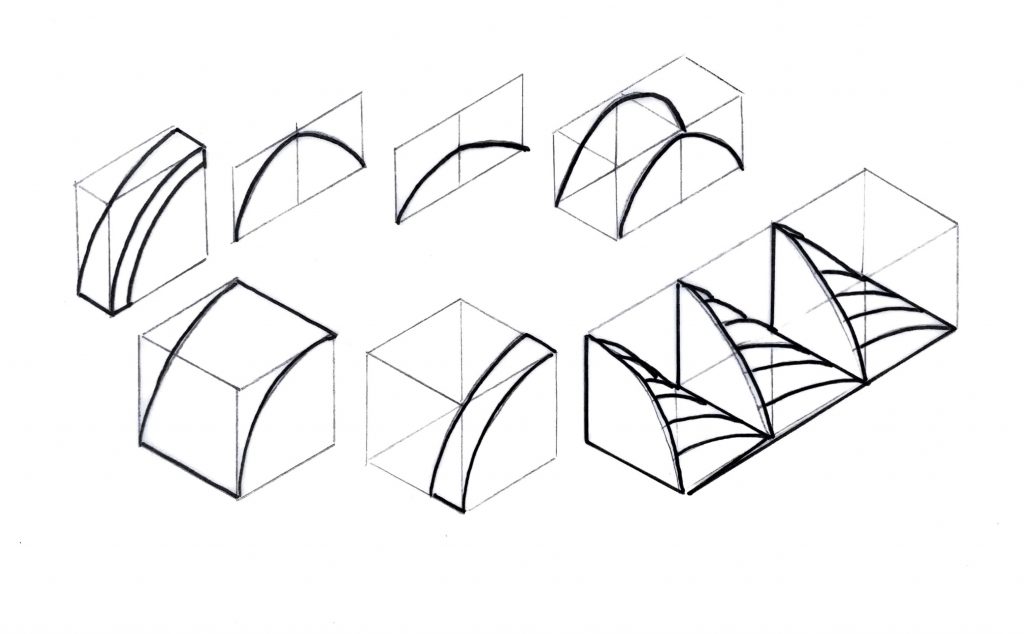
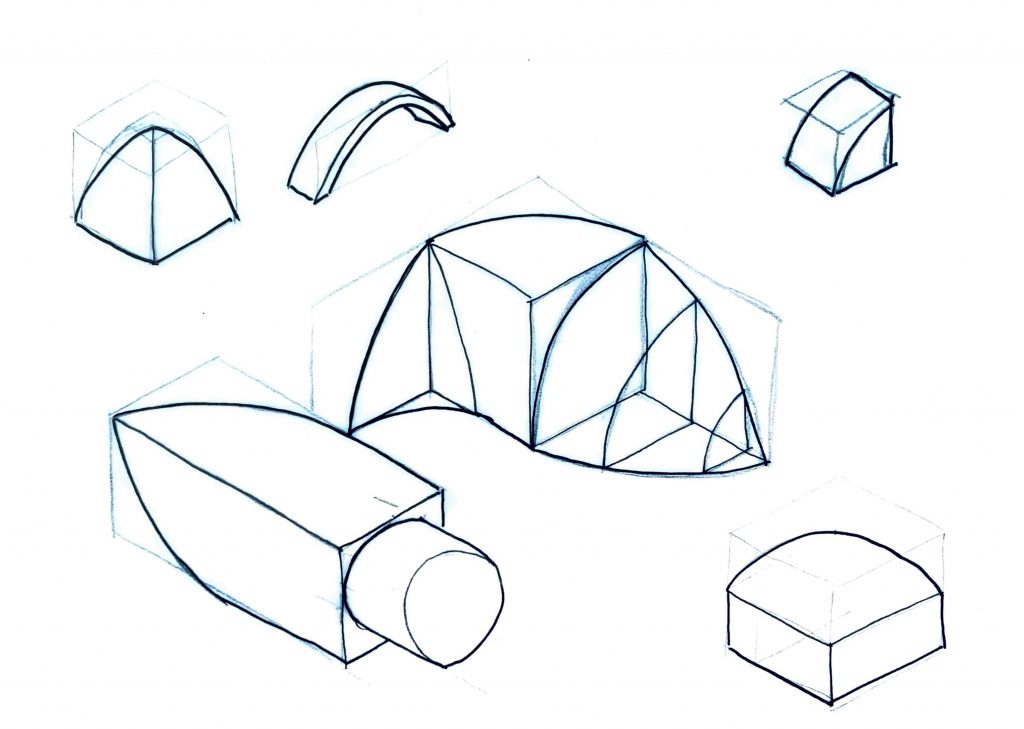
These are all drawn freehand. Try to draw your curves freehand; don’t worry about them not looking perfect, remember, this is about idea generation, producing ideas that match the speed of your thinking.
______________________________________________________________________
APPLICATION
- TASK 5
- Draw some basic seating using the crating system – use examples to initially copy from. Try to break it down into shapes within these crates. After a couple see if you can make up a seat of your own.
- TEACHER DEMO NECESSARY
- Show technique on using crates/curves to construct such an item
- Guide when they have a go on their own designs
- REASON WHY
- This enables you to see if they have really grasped the concept and start to move towards independent drawing and designing.
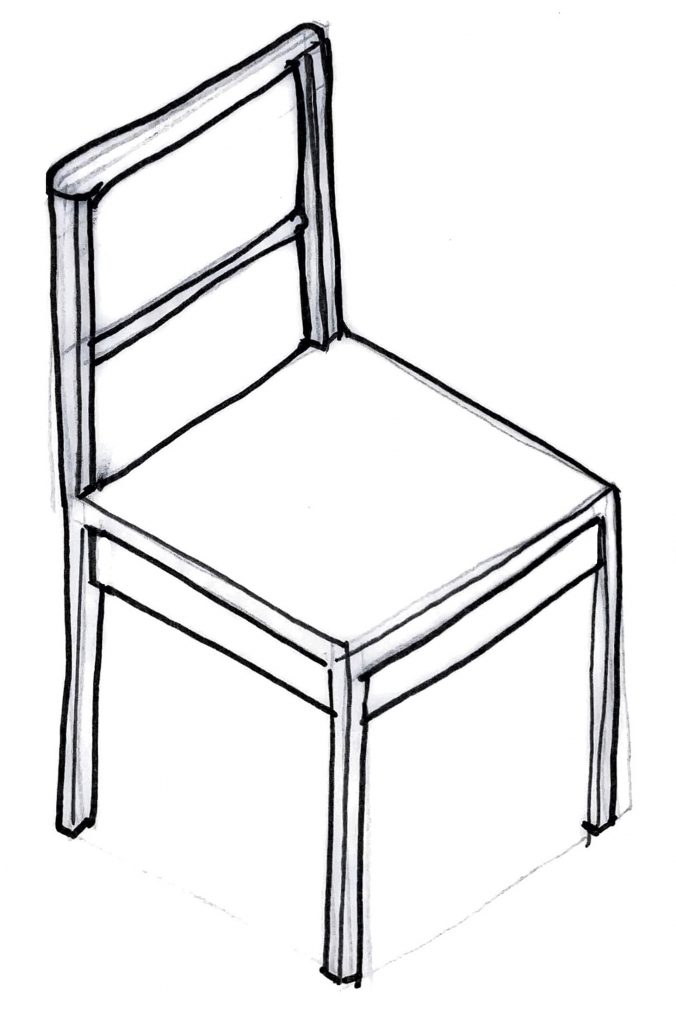
Basic Chair, drawn freehand. Try it without using a rule. Remember to use 0.6 fine liner for the profile lines and 0.1 fine liner for the crease lines after its drawn in pencil.
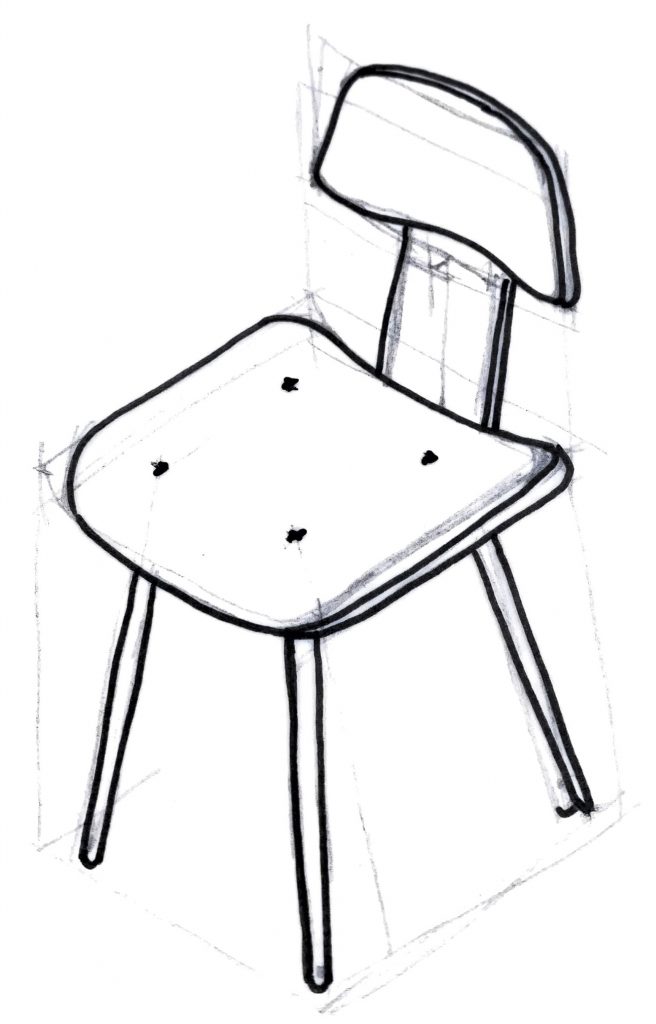
More Complex chair with curves. Still use the crates as a starting point, drawn freehand with a 2H pencil, then fine liners for depth before being scanned.
______________________________________________________________________
- TASK 6
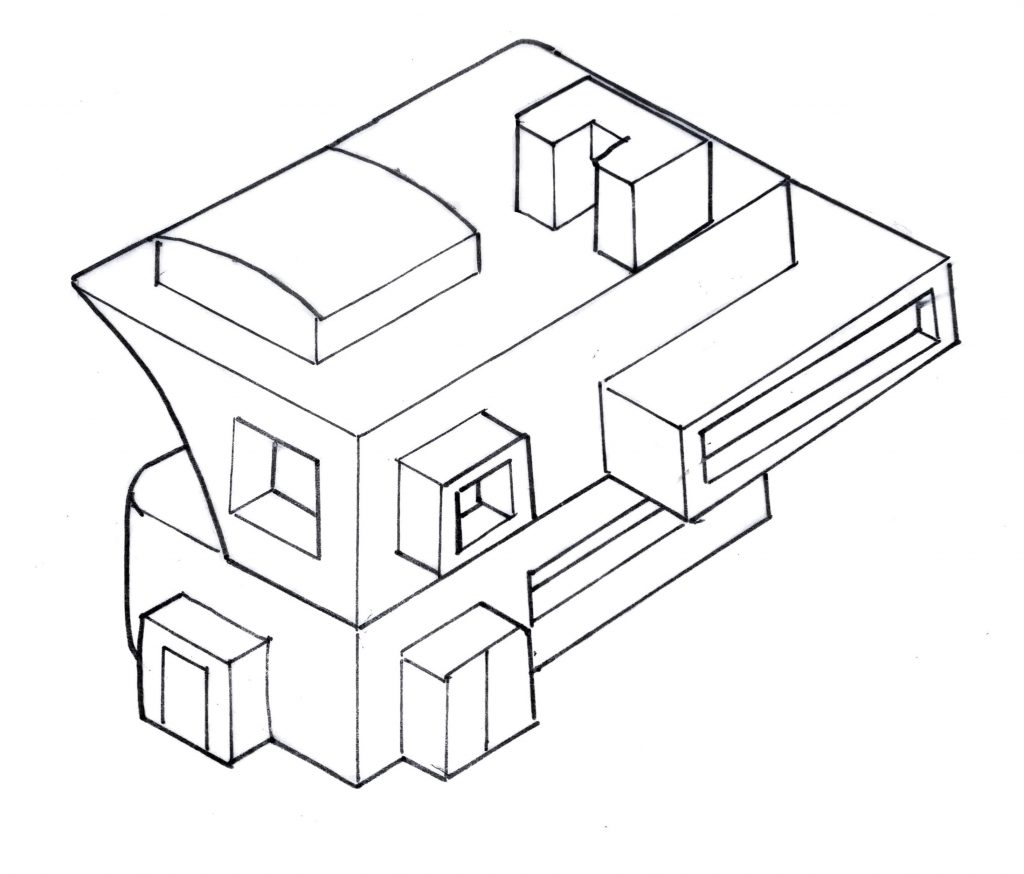
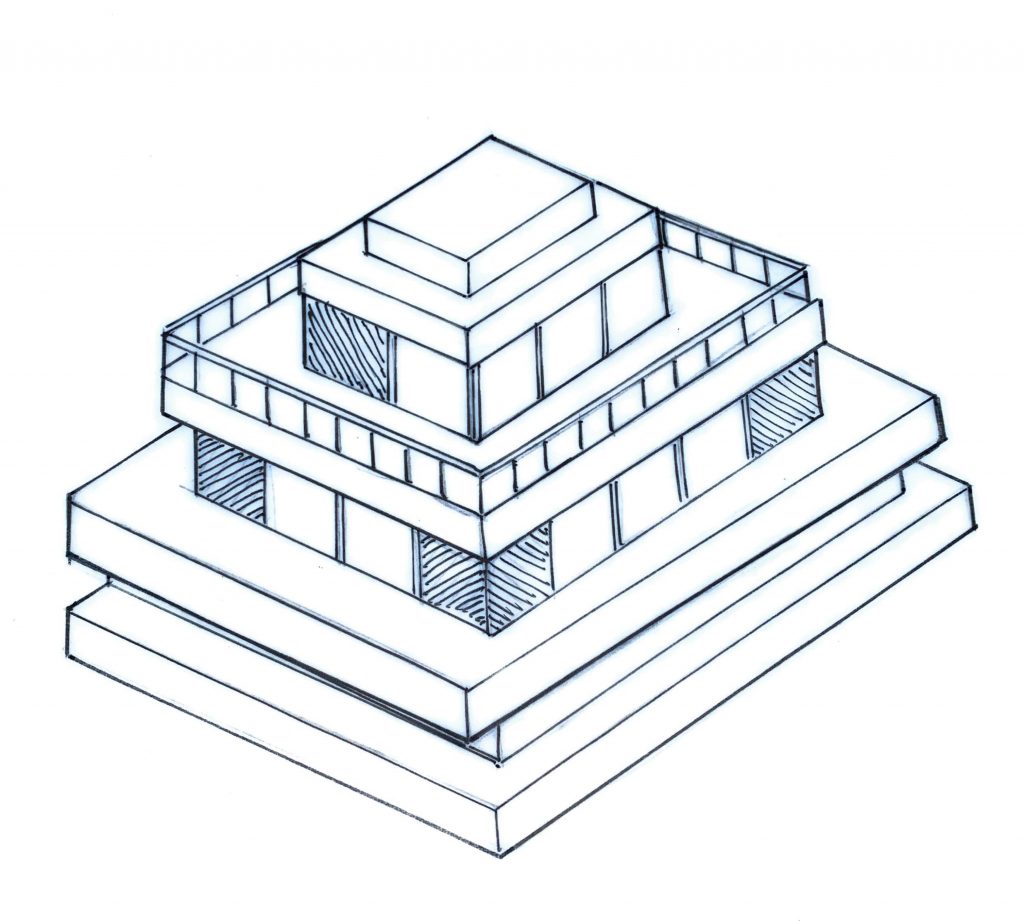
- Now using all you have learnt, draw a range of buildings, do these quickly and don’t worry if it goes wrong. If you are unhappy just move onto the next. Try to incorporate all the elements tried earlier
- EACH DESIGN SHOULD NOT TAKE LONGER THAN ABOUT 5 MINUTES
- TEACHER INVOLVEMENT
- General encouragement and support
- REASON WHY
- This is the first real design drawing task, which hopefully will show that students can express their ideas clearly in an effective, quick and


______________________________________________________________________
- TASK 7
- Using the isometric template below, on tracing paper, design an interior for either a shop or a room of your choice. Try to add in some of the features explored above such as addition, subtraction and curves. Remember to use the crating system to build up the designs
- TEACHER INVOLVEMENT
- Explain how furniture can be put in and that they can switch between using isometric grid paper to help assemble the interior
- REASON WHY
- Task 6 does exteriors and this task does interiors, but it does take longer and maybe better for development work
______________________________________________________________________
When complete, photograph each of your drawing using your scan app. If you use the Adobe Scan app, save first as a PDF, then as a jpeg which is under the more tab when you view the saved picture. You can tidy up the jpeg image a bit using the edit tools in the app or in Photoshop it’s very useful in getting rid of any unnecessary marks surrounding the design.